-
Climbing, Adventure, Gear & Choss


Speed Climbing Tips – Belay Exchanges
by Mike Schneiter

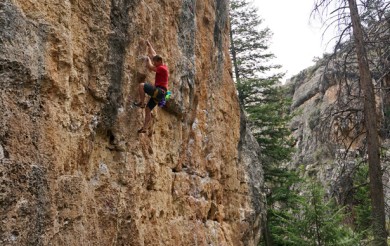
The endless slab of Crest Jewel in Yosemite.
Steve and I had set out that morning on what seemed like an audacious mission for two everyday climbers: 31 pitches of climbing with a few thousand feet of vertical gain, a 5 mile hike and a hitch-hiking return to Yosemite Valley. Our objective of climbing the classic Crest Jewel Direct on top of another classic, Royal Arches, had us worried enough about our finishing time that we arranged for a pickup that evening, skeptical that we’d be able to get a ride back to the Valley floor. Instead, we topped out on North Dome at 1:00 pm, leaving ample time to lounge on the summit, hike to the road and hitch hike back in time for an afternoon ice cream session. Part of our success lay in our speedy belay exchanges, which enabled us to shave considerable time off our day.
Many of us have been there, looking up at a party and wondering what is taking so long for them to exchange the belay and get climbing again. By simply adding some efficiency to your exchanges you could save five minutes or more at each belay, and while five minutes may not seem like much, if you’re on a 10 pitch route, those five minutes add up to nearly an hour. That could easily be the difference between stumbling around in the dark looking for the rappels, or drinking beers back at camp while watching the evening sun set.
While there are many things that go into fast belay exchanges, one simple, yet often overlooked, thing to improve is the process of transferring the second from follower to leader.

A simple belay setup with an auto-locking belay device.
First, when bringing up the second you should always be thinking about how you can make the exchange go more efficiently. One area where people waste a lot of time is securing themselves to the anchor, often with a daisy and perhaps the rope. This may be the “textbook” way to do it, but you can make things go quicker without sacrificing saftey. In this case, I usually clip a sling or a quickdraw into the anchor to provide a quick and easy access point for the second to clip into once they reach the belay. This also allows them to unweight the belay device immediately.

Clipping into the quickdraw to provide the first point of protection.
Next, I’ll tie a simple overhand loop in the rope behind the auto-locking belay device and clip it into the anchor with a locking carabiner. That provides the second anchor point. Meanwhile, the second can be grabbing leftover gear from my harness or gear sling and doing whatever necessary to ready themselves to lead.

The second climber is secured with an overhand knot behind the belay device and clipped into the anchor.
Once this is accomplished, I communicate with the second that I’ve secured them and that I’m taking them off belay to move the belay device into a lead-ready position. If you’re on a ledge this is made easier because the second can be standing, but if you’re at a hanging belay then that first anchor point is important because they can take their weight off that way. Save time here by simply unclipping the belay device from the carabiner on the anchor, leaving the rope running through the device, so all you have to do is reclip it into your harness. Don’t waste time taking the rope out and then rethreading it.

Taking the belay device off the anchor and…

…moving it into a lead belay position without unclipping and rethreading the device.
Next, I will clip a biner or a quickdraw into the anchor and clip the second’s rope into that piece as their first point of lead protection, further readying them to set off on lead. Meanwhile, I keep the rope tied into the anchor as a backup. Once the second has exchanged gear and is ready to lead, it’s easy to unclip that backup knot from the anchor, untie the knot, and you’re ready to belay the lead climber.

The lead climber’s rope is clipped into the first point of protection at top left and the backup knot is still clipped into the anchor for hands-free security.
Now, all of this works under the premise that it’s typically better to belay the second directly from the anchor (which can be a whole other debate for some people). There are, however, times when it is quicker to belay from your harness. Such was the case on the Crest Jewel for Steve and I, as we belayed directly from our harnesses with the rope redirected through the anchor with a quickdraw. In this case, when the second came to the belay we simply locked off the belay device and tied an overhand backup knot in the rope behind the device. If it was too steep or if there wasn’t a good belay stance to stand on, the second might also clip into the anchor with a sling. Often, however, the second grabbed whatever few pieces of protection they needed, and went from seconding to leading in a matter of seconds. This was made easy by the fact that the second was being belayed redirected through the anchor, which also served as their first piece of lead protection as they stepped over the belay and into lead climbing territory. Hence, we averaged less than 15 minutes a pitch on the Crest Jewel, with our belay exchanges all being under 15 seconds, thus enabling us to top out much earlier than expected so we could enjoy ice cream back in the Valley that afternoon.

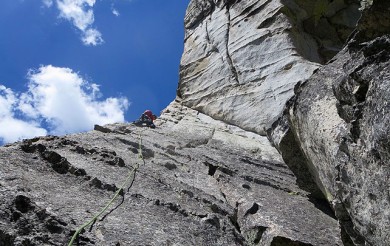
Mike & Steve on The Boot Flake pitch on The Nose of El Capitan.
Mike and Steve used their experience on the Royal Arches-Crest Jewel Direct linkup to help them climb The Nose in 14:52 five days later. Both are schoolteachers in Colorado who spend far more time in the classroom than out on the rock.

4 Responses to Speed Climbing Tips – Belay Exchanges


Bulldog Creek Dog Walk (IV WI 4+)
Hayden Carpenter and Tom Bohanon recently repeated an obscure ice climb on the south side of Mt Sopris. Given a brief mention in Jack Robert’s ice guide, Bulldog Creek Walk is described as being 100 meters of WI 4. What they found was seven pitches of ice in a remote setting that makes for one […]


Pingback: Black Diamond Chaos Harness Review | Splitter Choss