-
Climbing, Adventure, Gear & Choss


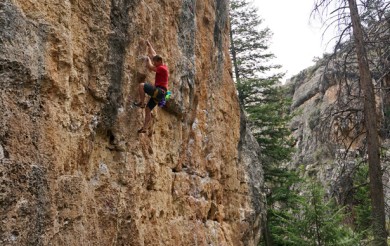
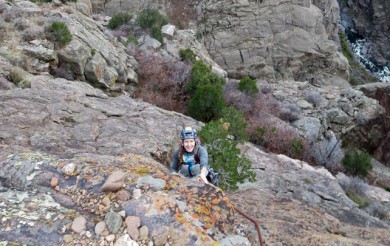
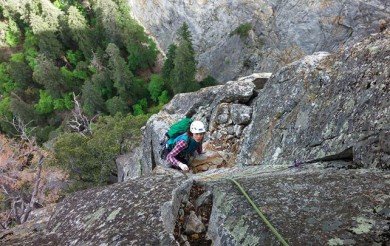
New Routes at the Narrows
Thanks to the hard work of a few devoted local developers, the Narrows has seen the addition of some great new routes recently. Here’s the rundown, there’s also a pdf download available at the end of the post.

The Notch
(See Rifle Mountain Park and Western Colorado Rock Climbs for directions)
The Health Issue, 5.11c
Climbs the arête left of Chiroptophobia. Climb past three bolts to a thin crack above a block (000 TCU and/or tiny Stopper). Follow the crack (good small cams or nuts), shifting left around the arête a couple of times, clipping a loan bolt on the left side (easily visible from the base), which protects moves onto a ledge. Scramble up ledges to another bolt, clip it and move left into cracks. Follow discontinuous cracks, staying on the exposed arête, to two bolts and a two-bolt anchor. Seven bolts, medium and small nuts, 3 purple (00) TCUs, single rack of TCUs and C4s to #1. 35 meters
Gold Brick, 5.11d
Climb Jenga Buttress crack or Village Idiot. From the anchors of Jenga Buttress Crack or by veering right at the last bolt on Village Idiot, continue up (#.75 green C4). Two bolts protect tricky moves through the first roof (crux). Place a C3 (red and/or yellow), and a good big nut. Turn the next roof and enter the steep, exposed face. Clip 3 bolts as you climb rightwards to the crack. Place a green and/or red C3, then a #1 (red) C4 to protect an endurance crux. Two or three long slings help with drag. To descend: Lower to the anchor on Jenga, and lower again. Gear: Green C4 (.75), 2 Red C3s, large nut, Green C3, Red C4 (#1) 50 meters
The Tombstone, 5.12b
Climb Jenga Buttress crack. From the anchors of Jenga Buttress Crack, step right and clip a bolt. Climb to the finger crack and place a bomber .4 camalot. Reach back and unclip the bolt to alleviate drag (or use long slings on the bolt). Turn the roof and clip a bolt. Then turn a couple more roofs, pull on the namesake “tombstone” to a crux lip encounter. Rejoin Gold Brick at the crack. To descend: Lower to the anchor on Jenga, and lower again.
Gear: Gray C4 (.4), green C3, Red C3, Red C4 (#1) 50 meters
Jenga Dihedral, 5.10
The obvious left facing corner to the right of Jenga Buttress Crack. Climb the corner to a bolt, then move right to a hidden finger crack and the anchor. Take single cams to #2 including C3s, a set of nuts and an extra .4 Camalot. 30 meters
Mojo Area
Approach by heading to the Notch. Drop through and pass Red Faction. Just past Red Faction you’ll reach a short, clean, steep wall with 4 routes.
Mojo, 5.12b 3 bolts
Climb the center of the clean wall. Short, but really good. Perfect rock.
Bumper to Bumper, 5.12a 4 bolts
Left of Mojo. Traverse left along crimpers to start. Alternatively, match in the distinctive slot and make a hard move to the sloping rail. This direct start is V6 or 7.
Biodynamic, 5.13b project 6 bolts
Beyond Organic, 5.11c 7 bolts
Traverse the arête starting far left.
This next route is on the obvious triangular-shaped clean face/spire closest to the highway, visible from the Avocado Gully/Gash parking area. Just downhill from the Mojo wall, scramble up a short gully with a fixed rope and access the base of the face.
Kurt Albert Memorial, 5.10d
Exposed belay. Climb the crack to 5 bolts and an anchor. Great position. Rack: Big nuts, single set of C3s and C4s to number 2 (yellow). 30 meters


Bulldog Creek Dog Walk (IV WI 4+)
Hayden Carpenter and Tom Bohanon recently repeated an obscure ice climb on the south side of Mt Sopris. Given a brief mention in Jack Robert’s ice guide, Bulldog Creek Walk is described as being 100 meters of WI 4. What they found was seven pitches of ice in a remote setting that makes for one […]


Recent Comments